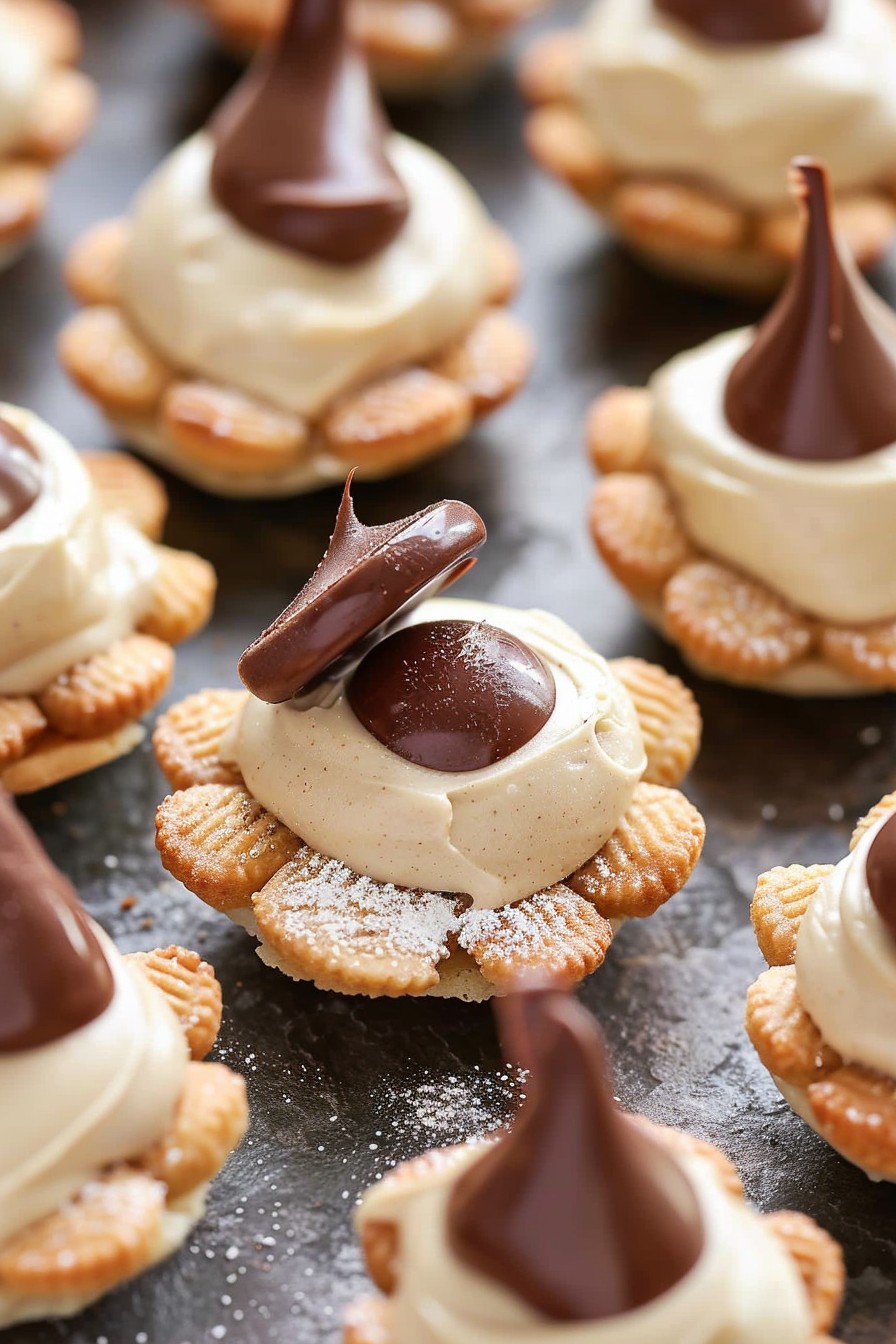
Baking can be a blast, but sometimes you just want a quick, no-fuss treat that doesn’t require turning on the oven. That’s where these No Bake Cookie Butter Blossoms come in! They’re the perfect blend of creamy cookie butter and crunchy cookies, all topped off with a chocolate kiss. It’s a match made in dessert heaven that’s ready in no time.
Why This Recipe Works
- No baking required means you can enjoy these treats even on the hottest summer days.
- The combination of cookie butter and chocolate offers a rich, indulgent flavor that’s hard to resist.
- They’re incredibly easy to make, requiring just a few simple ingredients and steps.
- Perfect for last-minute gatherings or when you need a quick dessert fix.
- Customizable with different types of cookies or chocolates to suit your taste.
Ingredients
- 1 cup cookie butter
- 1/2 cup powdered sugar
- 1 tsp vanilla extract
- 24 small cookies (like shortbread or vanilla wafers)
- 24 chocolate kisses, unwrapped
Equipment Needed
- Mixing bowl
- Hand mixer or whisk
- Measuring cups and spoons
- Plate or tray for setting blossoms
Instructions

Step 1: Mix the Cookie Butter Filling
In a mixing bowl, combine the cookie butter, powdered sugar, and vanilla extract. Use a hand mixer or whisk to blend until the mixture is smooth and creamy. This should take about 2 minutes on medium speed. The filling should be thick enough to hold its shape when scooped.
Step 2: Assemble the Blossoms
Take a small cookie and place a teaspoon of the cookie butter mixture on top. Gently press a chocolate kiss into the center of the filling, making sure it’s secure but not squishing the filling out. Repeat this process with all the cookies.
Step 3: Let Them Set
Arrange the assembled blossoms on a plate or tray. Place them in the refrigerator for at least 30 minutes to allow the filling to firm up. This step is crucial for ensuring the blossoms hold their shape when served.
Tips and Tricks
For an extra touch of elegance, drizzle melted chocolate over the blossoms before refrigerating. If you’re in a hurry, you can place them in the freezer for 15 minutes instead of the fridge. To prevent the cookie butter from sticking to your hands, lightly wet them before handling the mixture. Experiment with different types of cookies and chocolates to find your favorite combination. Remember, the key to perfect blossoms is patience during the setting phase.
Recipe Variations
- Swap out the chocolate kisses for peanut butter cups for a different flavor profile.
- Use graham crackers instead of shortbread cookies for a s’mores-inspired version.
- Add a sprinkle of sea salt on top before refrigerating for a sweet and salty twist.
- Incorporate crushed nuts into the cookie butter filling for added texture.
- Try using white chocolate kisses for a visually striking contrast.
Frequently Asked Questions
Can I use homemade cookie butter?
Absolutely! Homemade cookie butter can be a great alternative if you prefer controlling the ingredients. Just ensure it has a similar consistency to store-bought versions for the best results.
How long do these blossoms last?
Stored in an airtight container in the refrigerator, they can last up to a week. However, they’re best enjoyed within the first few days for optimal texture and flavor.
Can I make these blossoms vegan?
Yes, by using vegan cookies and chocolate kisses, along with a plant-based cookie butter, you can easily adapt this recipe to fit a vegan diet.
Summary
No Bake Cookie Butter Blossoms are the ultimate easy dessert, combining the rich flavors of cookie butter and chocolate without any baking required. Perfect for any occasion, they’re sure to be a hit with everyone who tries them.